
Recently I have been obsessing over the make shift vanities I have seen on Pinterest and was inspired to create my own! After moving home from living in New Jersey for a few years, I decided that it was time to get rid of my childhood furniture, sorry mom but your childhood furniture needed to go! I had acquired my own home goods while living alone and knew that I wanted to update my room with them. Typically bedroom renovations take forever in my house. I had pink room with a unicorn border until my senior year of college and my sister still has a purple room with a doll boarder, so using my new furniture was a MUST! Again sorry mom! Although I had new furniture, I did not have a desk. There was no where for me to draw, sew or store my makeup. Thankfully Pinterest came to the rescue! After doing a ton of research I finally decided how I was going to go about my perfect multi-use vanity.
 Step one: Get a Desk! Now this is easier said then done for me. There are so many to choose from! I went with this desk from IKEA and it wasn’t that difficult to put together.
Some other good places to check out are Target, Home Goods, Etsy (if your willing to spend a little more), and Pier One.
I wanted to find the perfect desk to fit my space. At first I looked at Home Goods, Target, Walmart and Pier One. I wanted to find a something that was chic and fit the other furniture in my room, but nothing wowed me at first. I finally took my research online, again tracing back to Target and also adding in Etsy, Overstock and IKEA. I had found the perfect vanity on Etsy, but unfortunately it was too costly for me. Lone be hold I was wowed by a desk from IKEA! (Going to IKEA to get said desk and putting it together, although easy, is another story on its own). Step One Complete!!
Step Two: Find a mirror that fits the theme you are going for. I wanted my space to be 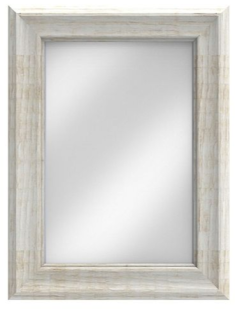 chic so the mirror I went with was one from Home Goods. For $20 it is huge and adds a classic feel, plus it’s white color brightens up the desk.
Home Goods would be my number one recommendation for a mirror. They have all different sizes and are pretty inexpensive. If your feeling extra crafty you can even make your own. You can buy a square un-framed mirror from Target and then buy a cute frame to glue around it.
Step Three: Organize your drawers. Now if you are going to use a desk for a vanity like I am, organization is key. I decided that one drawer will be used for make up and the other will be used for some of my art supply’s. IKEA has great  cheap drawer organizers like this one.
You can also search around for others that will better fit your needs.
I am still on the market to find drawer organizers that are molded to my specific needs, but there have been some great ones at Home Goods, Marshals, and IKEA.
Step Four: Add Table Decor. I decided that some of my makeup (like my brushes) I wanted sitting on top of my desk to give it more of a vanity feel. Here is some of what I chose to decorate with:
 This faux flower vase was calling my name at Home Goods! It was only $10 and the best part was that the flowers wont die on me.
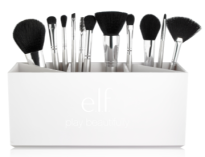
I got this brush holder through ELF during their cyber Monday sale and is perfect. It has three sections and even labels them as eyes, lips and face. Perfect for those who are super organized and the color even matches.
Some other things I have for decoration is a candle from Bath and Body Works, various fashion books, and an image of my dogs.
Step Five: Choose Great Lighting. Now lighting can coincide with the mirror if you want. They sell some pretty cute vanity mirrors with lights on Etsy. If your not about spending too much on a mirror light check out some cute alternatives from IKEA that would work great!
Step Six: Decorate the Wall. Now this is super important! If your going to be sitting at your vanity every day you need something else to stare at besides yourself! Check out some cute ideas below!
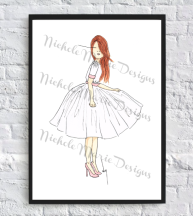


A framed fashion illustration is the perfect addition! These happen to be ones I have personally drawn and will soon be offering on my Etsy shop.
Something else I did to make my wall more appealing is frame my favorite store’s shopping bags! This is a great idea for all the fashionistas out there!
Step Seven: You are going to want some shelves! Target has some great small ones that you can place lower on your wall to use as extra storage. That ELF brush holder would go nicely on the shelf, or even some of your favorite perfumes!
Step Eight: Finally you will want to find the perfect chair to tie it all together! Chairs can be the hardest part, I am still personally looking for one and am periodically checking the stock at Home Goods. Overstock.com and Target have some great chairs if you do not have the same type of patients as I do. Just make sure you are choosing the best chair to fit both your theme and practicality. You do not need any type of complications!
After you have everything you need your space should be complete! Here’s Mine:

Comment with your own DIY Vanities as seeing others is always inspiring! Also, don’t forget to check back for the opening of my Etsy shop to add some more personality to your vanity space!
